Step-by-Step Guide to Lease Signing and Rental Agreements
When you’re renting, nothing’s official until the lease is signed. Expectations between you and your landlord are outlined in the document. You can consider it as your road map to a confident and comfortable life in your new place.
It can feel overwhelming to flip through page after page of legal jargon. The reality is that signing a lease is simple once you know the procedures, and it’s meant to safeguard both parties. Establishing ground rules to ensure that everyone is on the same page is more important than adding red tape.
To help you feel comfortable signing on the dotted line (or clicking “accept” if you’re signing digitally), this guide explains common terms, takes you step-by-step through the process, and offers helpful advice.
Step 1: Application Approval
Before you ever see a lease, you’ll fill out a rental application. Think of it like a job interview — your future landlord wants to know you’ll be a responsible renter.
A standard application may include:
- Proof of income — pay stubs, offer letters, or tax returns.
- Credit check — to review your history of paying bills.
- Background check — sometimes required in community settings.
- Rental history and references — proof you’ve been a good tenant before.
Yes, it can feel like a lot of personal info. But remember: the landlord is choosing someone to trust with their property. Once you’re approved, you’ll get the green light to move forward — and that’s when the fun part begins.
Step 2: Getting the Lease Agreement
This is where things shift from “application” to “commitment.” The lease is the official contract that covers the who, what, when, and how of your tenancy. Reading a lease agreement can be a bit scary, but with a little preparation you will understand—it’s just the rules of your rental, written down. Here’s a quick guide to what you’ll find:
- Lease Term: It’s the time duration you’re renting the place, which can be a less than or more than a year.
- Rent Information: This section includes information on the precise amount, the due date, and the method of payment.
- Security deposit: The money you pay up front is known as the security deposit. If you leave the area tidy and undamaged, you should get this back.
- House Rules: This section outlines what is and isn’t permitted, including guidelines for parking, noise, pets, and smoking.
- Repairs: This section makes it clear who is responsible for what. While the landlord takes care of larger problems, you may be in charge of minor repairs.
Pro Tip: Don’t rush. Read everything carefully, highlight anything that doesn’t make sense, and ask your landlord to explain. A good landlord will appreciate you being thorough.
Step 3: Understanding Key Terms
Terms that sound like legalese are frequently found in leases. These are the ones that are most important:
The brief time after rent is due before late fees are assessed is known as the “grace period.”
- Utilities: Which bills are your responsibility and which are covered by the landlord.
- Occupancy Limits: The most people that a house can accommodate.
- Subletting: This is when you rent your place to someone else while you’re still on the lease.
Knowing these terms early saves you from headaches later.
Step 4: Walkthrough and Move-In Inspection
Before moving in, do a walkthrough with your landlord or property manager. Skipping this step is one of the most common mistakes renters make, and it can cost you your deposit down the line.
- Bring your phone and take photos or video of every room.
- Test appliances, faucets, doors, and windows.
- Note scratches, stains, or leaks.
- Make sure everything gets written on the inspection form.
- This takes 20–30 minutes but protects you from being blamed for damage you didn’t cause. Think of it as an insurance policy for your deposit.
Step 5: Negotiating (Yes, You Can)
A lease isn’t always final. While you probably can’t trim hundreds off the rent, small tweaks are often possible.
Examples:
- Adjusting your move-in date.
- Negotiating pet fees if your pet is well-trained.
- Requesting permission to paint or add shelving.
- Clarifying who handles yard work in a townhome.
Remember, it’s a contract between two parties. It should feel fair on both sides.
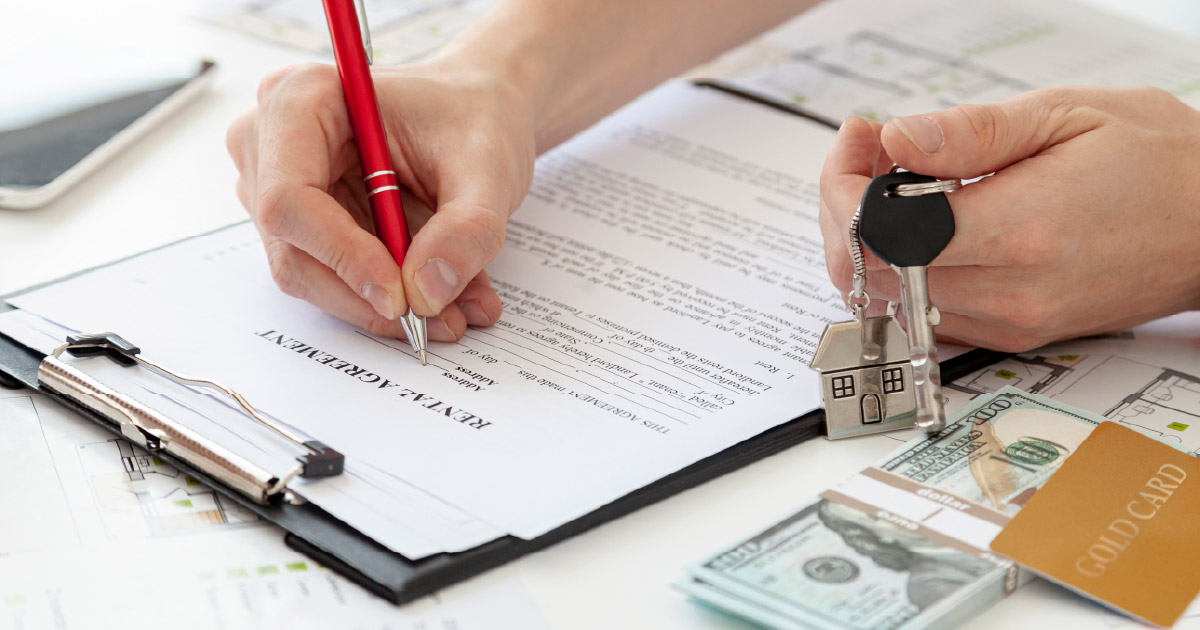
Step 6: Lease signing
When you’re prepared, it’s time to make it official. While some still prefer pen and paper, many landlords now use digital signing platforms.
Typically, you’ll need to supply:
- A valid photo ID.
- Rent for the first month (and occasionally for the previous month as well).
- Security deposit.
- Any required pet or admin fees.
Once signed, you’ll receive a copy — keep it safe, either in print or stored in the cloud.
Step 7: Paying Move-In Costs
Here’s the part where costs can add up quickly. Be prepared to cover:
- Security deposit.
- First month’s rent.
- Pet deposit or pet rent (if applicable).
- Application or admin fees.
Planning for these expenses upfront makes move-in day a lot less stressful.
Step 8: Move-In Day
This is when it all feels real. You get the keys, codes, or fobs, and your new space is officially yours. A good landlord or property manager will also:
- Walk you through community amenities.
- Show you how to request maintenance.
- Explain parking, trash pickup, and mail delivery.
Yes, moving is stressful — but it’s also the start of your next chapter.
Step 9: Living by the Lease
Once you’re settled, the lease becomes your rulebook. Following it makes your rental experience smoother.
- Pay rent on time (autopay helps).
- Follow community rules and respect neighbors.
- Report maintenance issues quickly.
- Take good care of the home.
When you do your part, your landlord will too. It’s the foundation for a stress-free living arrangement.
Step 10: Renewal or Move-Out
You will typically receive notice 60 to 90 days prior to the expiration of your lease as it draws to a close. This is your opportunity to:
- Renew your lease, sometimes with a small increase in rent.
- If you want stability, ask for a longer lease.
- If it’s time for a change, start planning your move.
- Plan a walkthrough, fix any minor issues, give the place a thorough cleaning, and return the keys if you’re moving out.
- The better you leave the home, the more likely you’ll get your deposit back.
Extra Tips for a Smooth Lease
- Don’t skim — read every page.
- Ask questions before signing.
- Get promises in writing.
- Stay organized with receipts, emails, and your lease copy.
Why It All Matters
Renting is more than just paperwork — it’s about finding a place to live and being part of a community. You can take advantage of facilities you don’t have to keep up and the flexibility to relocate when your circumstances change. Renting is not only a last resort for many people; it’s a lifestyle choice.
Final Thoughts
Consider a lease to be your manual for living sensibly and comfortably in your new residence. Although it may initially seem overwhelming, every part of it—from move-in day to renewal—is designed to make your rental experience smooth
Thus, read carefully, ask lots of questions, and take your time. Recall that the purpose of this process is to instill confidence in you. Making a place feel like home is far more significant than simply signing a contract.